Using a circle map in your classroom and working smarter, not harder, is what we are talking about today. We all know we need to meet our students where they are and allow them to work as independently as possible. But that often seems like an insurmountable task that will take us hours of prep time.
But what if it didn’t have to be that way?
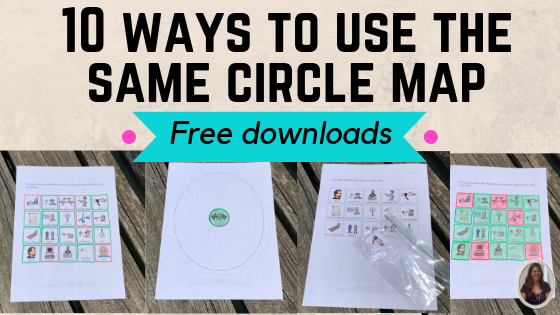
What if you could take the exact same resource, a circle map, and with some quick tweaks with crayons, markers, and scissors, you had 10 different ways to use the same activity with your diverse group of students? Let me show you how!!
1. Circle map with no pictures
So, this is for your highest-level learners. They often do not even need pictures or prompts to complete their work. They are good readers and can write and spell common words from the lesson. So, for this student, you simply hand him the circle map without pictures. Ask him to fill in as many details as he can from the story to support the main idea. Will he likely look around at the pictures his classmates have? Sure. But that is okay. He is completing the activity at an appropriate level for his learning and, most importantly, doing it entirely independently.

2. Circle map with wrong answers mixed in
This is the next level. This one is for students who can discern what does and does not relate to the main point, but it definitely requires the support of pictures.


3. Circle map with wrong answers mixed in, plus outlining with color
Again, this is for students who can handle mixed-in wrong answers but need a little more support. I outline the correct answers in green and the wrong answers in red. You can also put an X through the incorrect answers.


4. Circle map with wrong answers mixed in, plus coloring it in
This just adds a little more support for those students who can handle the wrong answers being mixed in. This time, instead of just outlining the correct and wrong answers, I actually outline them AND color them in. As an added bonus tip, this is so easy to fade to just using outlines.


5. Errorless circle map
So in this case, you are providing ONLY correct answers to the student. Every picture gets cut out and goes in the circle map. It still serves as a great review tool, and the student did it all on her own!


6. Errorless (or not!!) circle map with pictures cut out
We often have students who truly struggle with fine motor skills. Cutting out pictures is very difficult and requires a lot of concentration. That concentration could often be better used (in this case) to actually create the circle map. And here is the beauty. If you remove the stress of cutting out pictures, some students can totally handle the wrong answers being mixed in. Bottom line, we are not assessing the ability to cut in this activity. We are creating a visual map of the lesson’s main points.


7. Circle map with enlarged pictures
Okay, I know this may take an extra step. BUT, if you email me that you need enlarged picture choices (as some of you have), I will do that no problem and email them right back to you!! (sp************************@***il.com) This activity is perfect for our students who have significant fine motor struggles or have lost that ability altogether. Again, the goal of this activity is to determine 1) if students understand what the main points of the lesson were, and 2) to create a visual map of those main points for review. So, if your student is truly incapable of cutting, pasting, or writing, then simply hold up 2 choices and ask which goes in the map. Using their preferred communication method, they should be able to tell you which picture corresponds to the circle map. Of course, you can ALWAYS simply eliminate the wrong answers and make it an errorless task. Either way, the STUDENT is telling you which pictures to use in the circle map.


8. Circle map using photos
This one can be a little tricky AND may require a little more work. Some students are just not ready for images, and need photos, you replace the images with photos and you have not only the perfect activity for THIS learning level, but an additional activity all of your students can benefit from.
9. Circle map using color only
If you teach in a multi-grade-level classroom, you often have very young students participating in the same lesson as your older students. Let’s say you are teaching a lesson on the Civil War, but you have kindergarten students in the group as well. You read the story to the whole group. Everyone can benefit from hearing the story. For your very young learners, when it comes to the circle map activity, go back to the color-coding option. Heavily color in the correct answers as well as the center image of the circle map. Students are then doing a circle map of all the yellow answers. The content, which may be above their grade level, is irrelevant. BUT the color-matching task is not.


10. Circle map with objects
So I’m adding this as a last option because I know it can be really difficult to find the objects you need. I know, I tried this many, many times with my students. But if you have students who are truly significantly impaired and need a more tactile way to complete the activity, then using objects is always a good choice. Unfortunately, it is not always practical, and I realize that. I found using a hula hoop, or even just a box to put the items in, made it more likely that the student could complete what I was asking independently.
So there you have it. One circle map used in 10 ways. And most of them took very little, if any, extra prep time. The goal of the course is to increase our students’ independence, but it is more than that. By using one activity for ALL of your students:
- Saves you time
- Saves you frustration
- Helps eliminate overwhelm
- Increases engagement for your students
- Increases your excitement
- Saves you money
Want to try it? Click on the link below to download my book on the Civil War and accompanying circle maps. Then, use it with your students. ALL of your students. Email me a picture and comments on how it worked out, and I will send you the rest of my Civil War unit for FREE. How can you lose? Email me at: sp************************@***il.com
Download the resources below by clicking the button.
8 Comments
Comments are closed.