
We are all so busy. I know how it is, you find the perfect activity, but only about half of your class will be able to complete it. What if there were a way to take the exact same activity and modify it just enough so more of your students could not only complete it with less help but also actually learn from it? Well, there is a way. More than one way, actually, and it won’t cost you a ton of time or money… AND it really works.
(Be sure to read to the bottom so you don’t miss out on some awesome FREE downloads.)
Sorting Activities
I love having students do sorting activities. It is a quick and easy way for me to gauge their basic understanding of the material. Of course, it usually only involves two choices, so they have a 50/50 chance to begin with, but it is a great place to get started.
Let’s look at the following sorting activity:
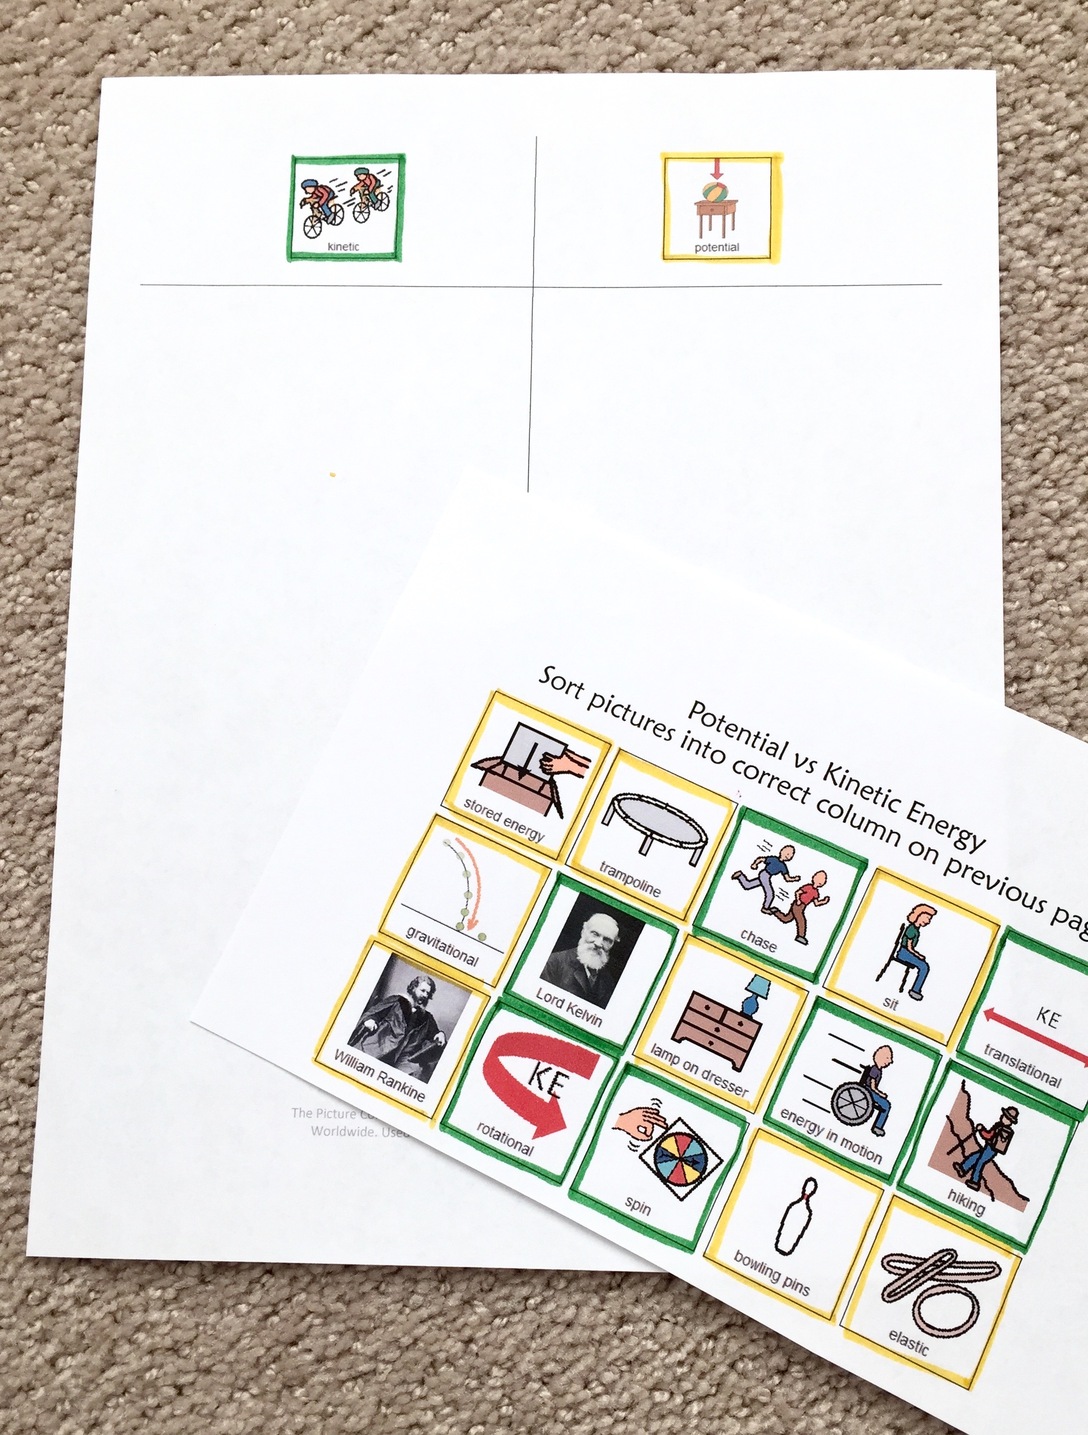
In this example, you want the students to decide whether a picture represents kinetic or potential energy. (This is from my unit on Potential and Kinetic Energy. It is best for middle or high school. You can check it out HERE.) You will probably have a few kiddos who can do this, no problem. Yeah! But let’s add a little extra visual support.
- Outline the sorting labels, each a different color. Then do the same to the sorting choices.
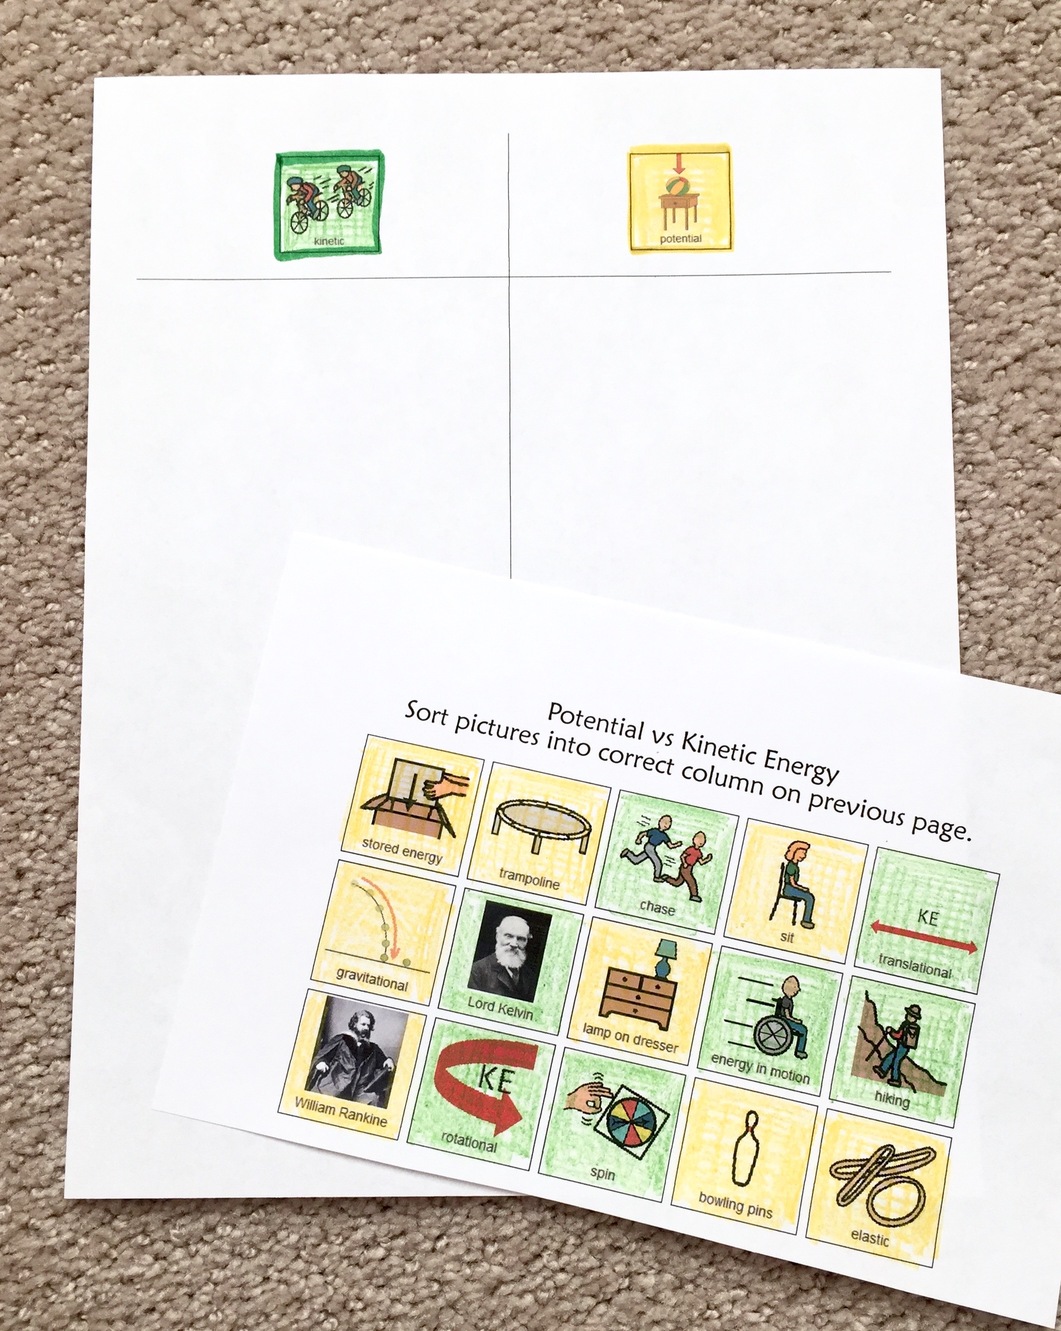
2. Color in each sorting label a different color. Then do the same to the sorting choices.
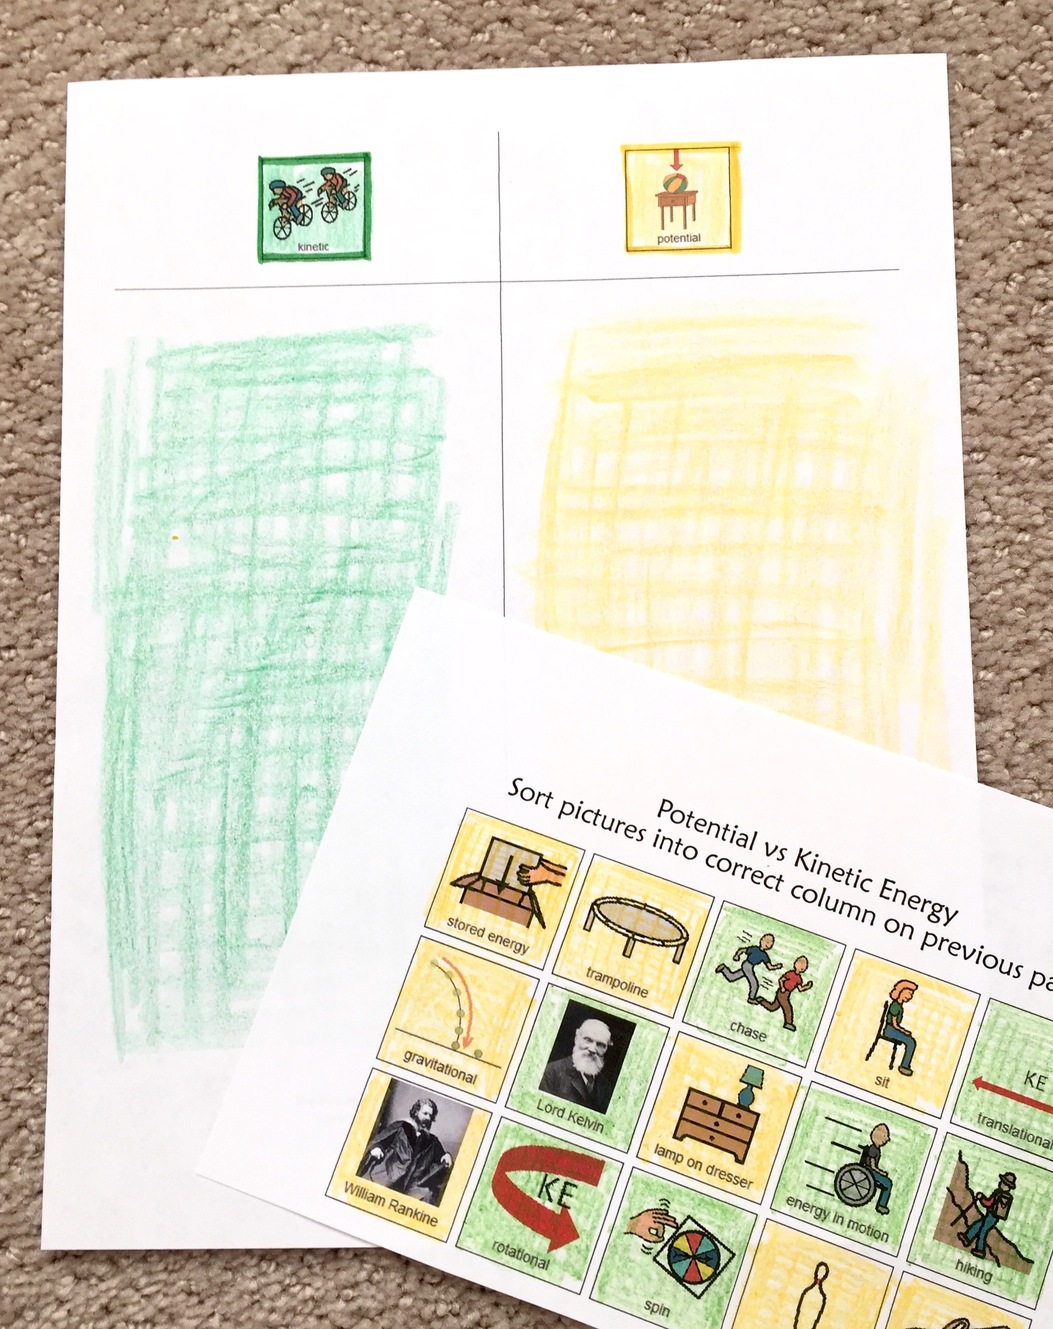
3. Color in the actual columns of the sorting template to make the distinction even more obvious.
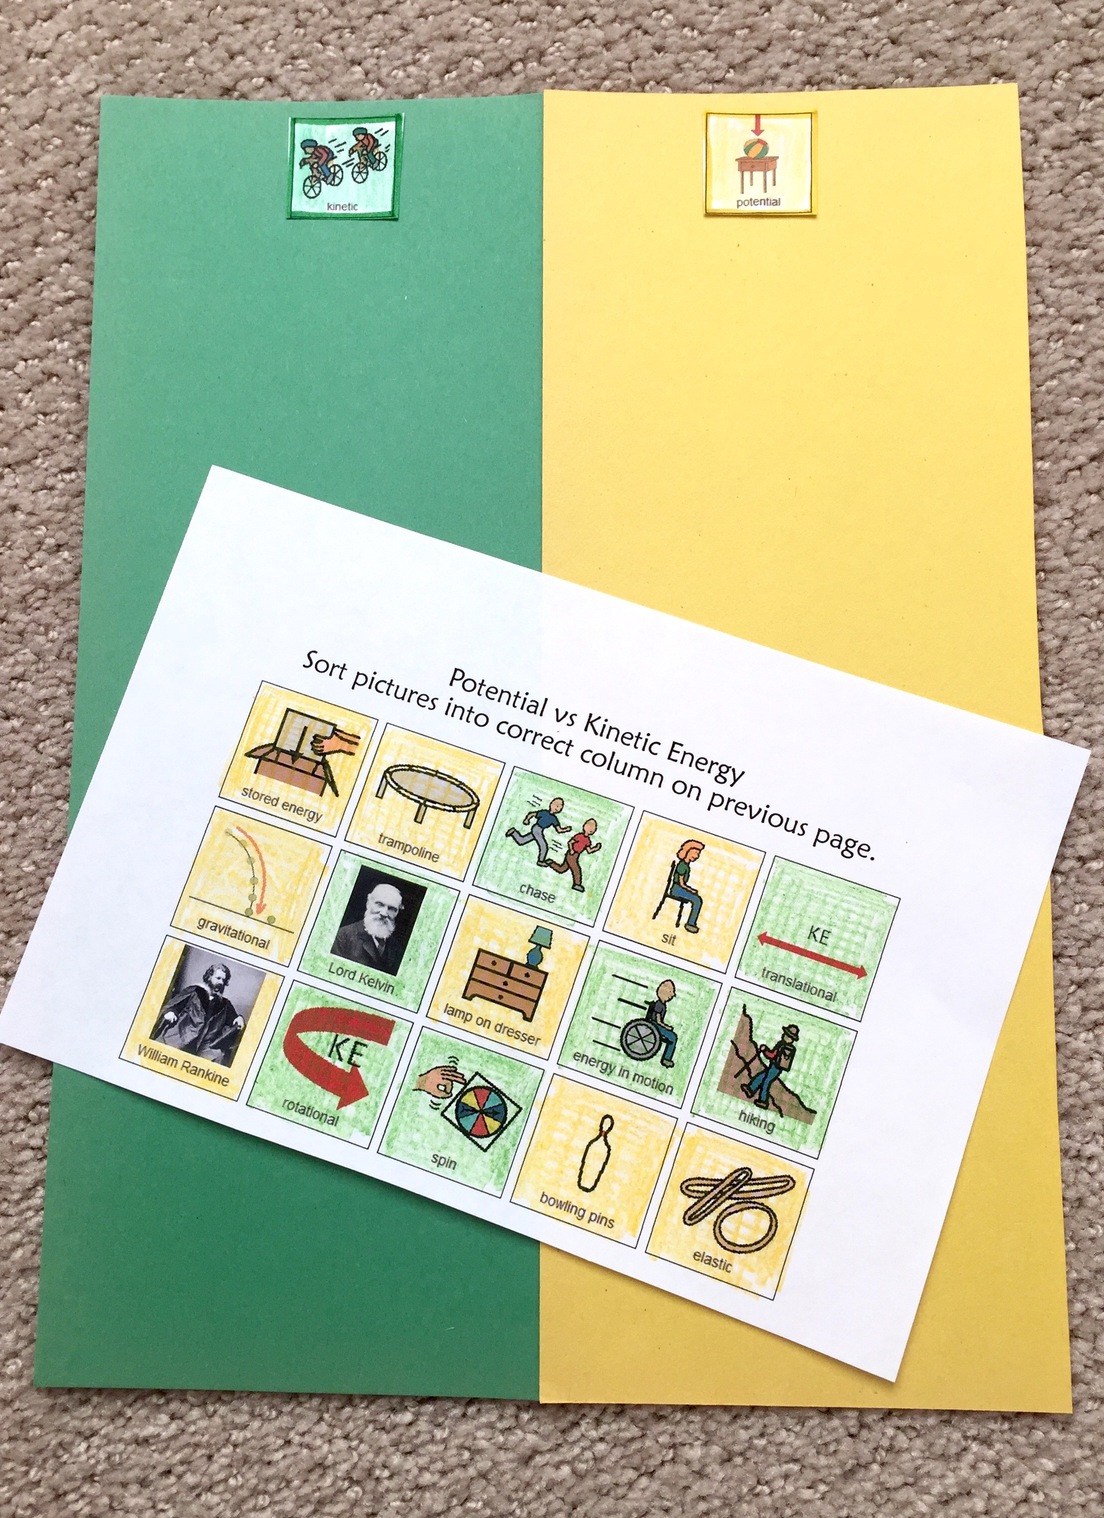
4. Color in the sorting choices and then place the sorting labels on two pieces of colored construction paper that are the same colors.
Venn Diagrams
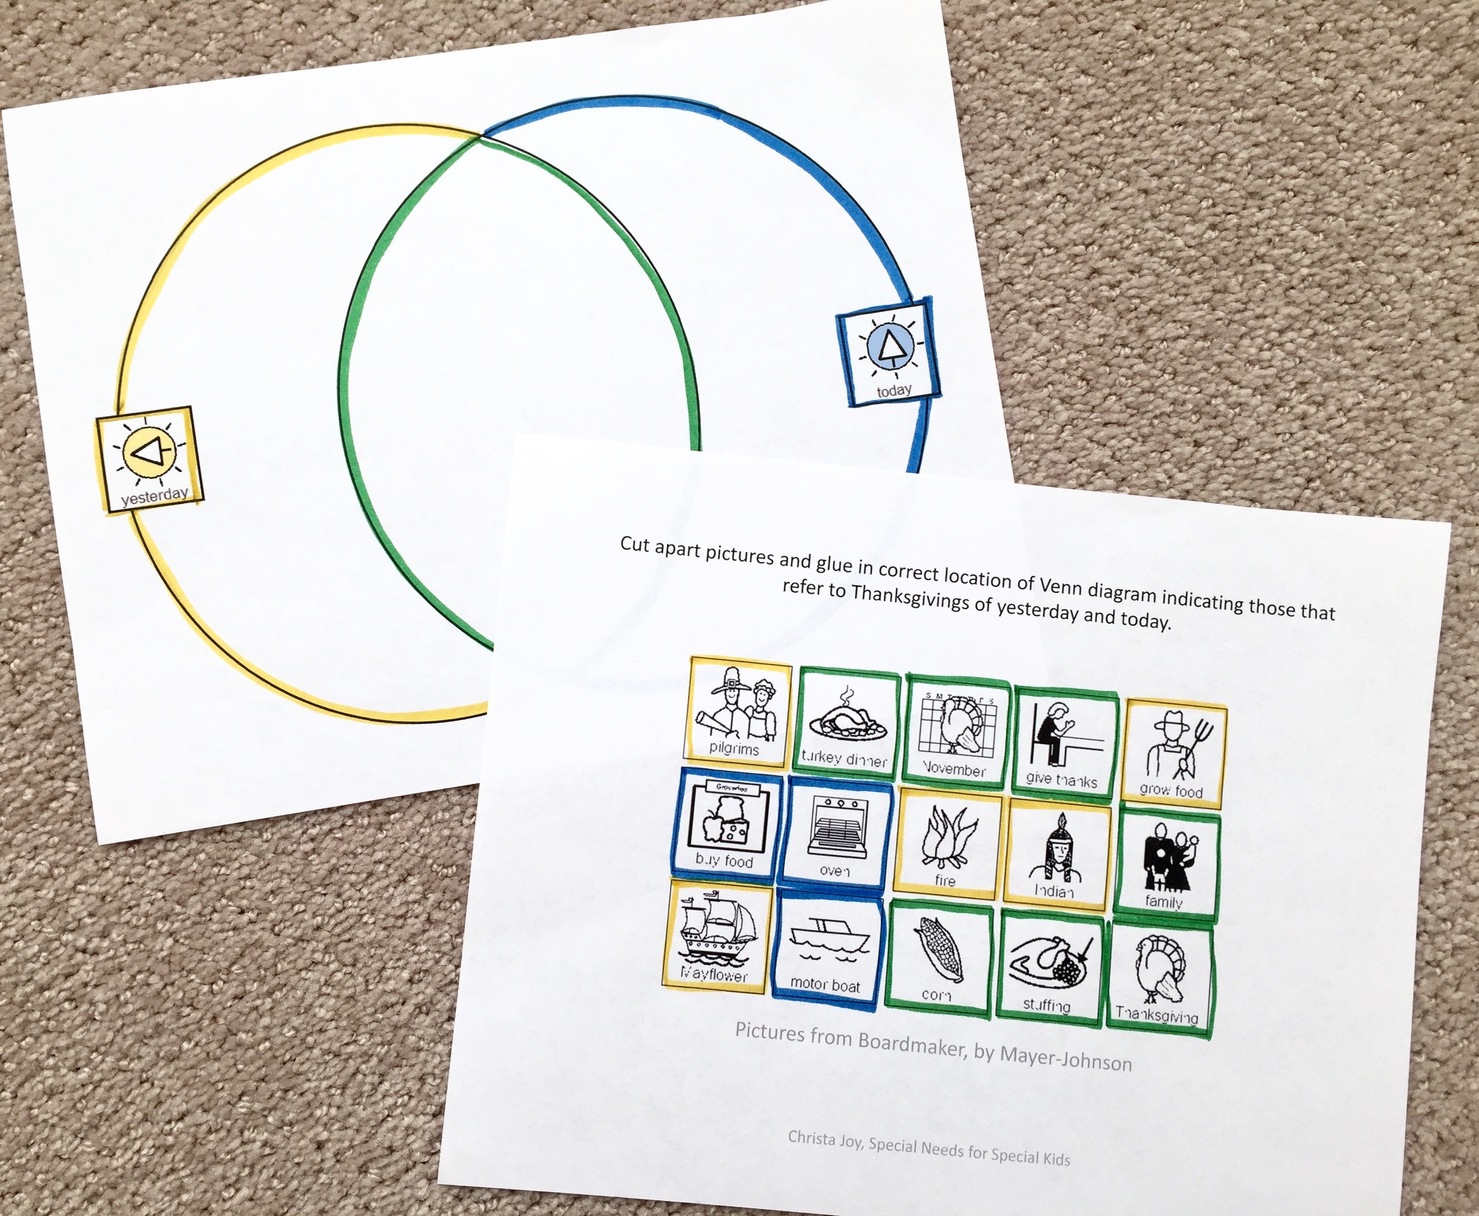
I LOVE Venn Diagrams. I find there are so many questions I can ask about them when done. For example, when comparing 2 time periods, I can ask which had more. What is one thing that was present long ago and still today? There are some simple ways to make this activity a little easier for your early learners. (This activity comes from my Thanksgiving unit. You can check it out HERE.)
- Outline each circle and the intersecting part in a different color. (You will use 3 colors). Then do the same with the pictures that go in the diagram.
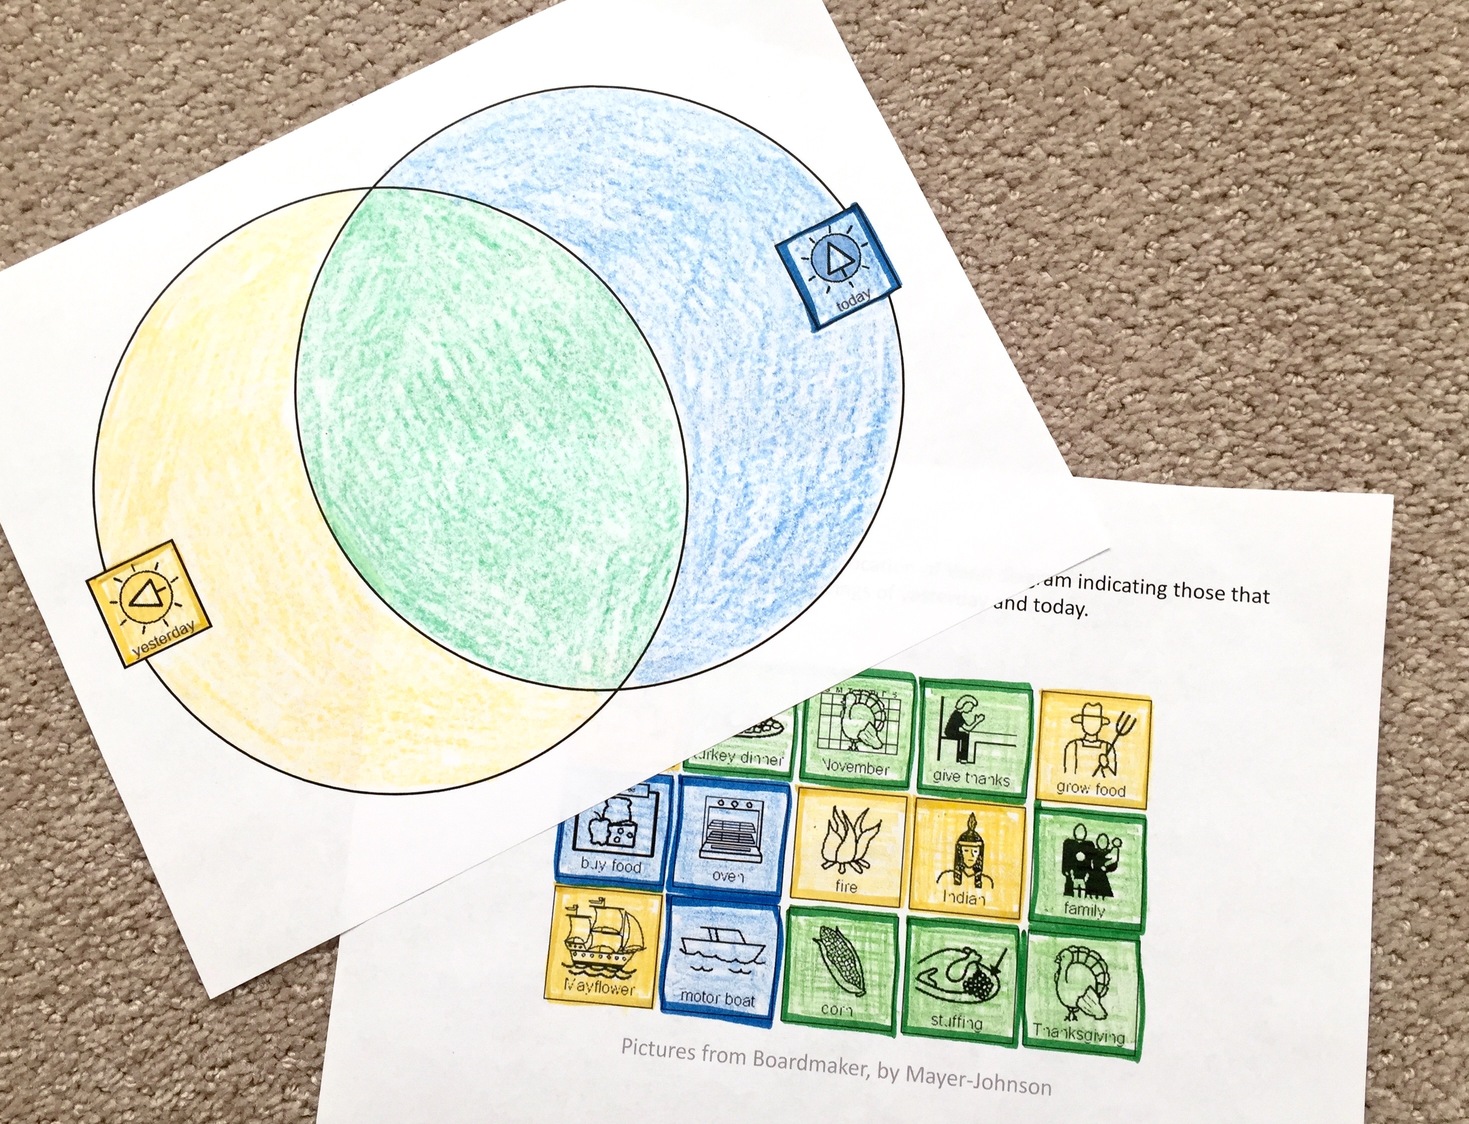
2. Color in each circle and the intersecting part a different color. (You will use 3 colors). Then do the same with the pictures that go in the diagram.
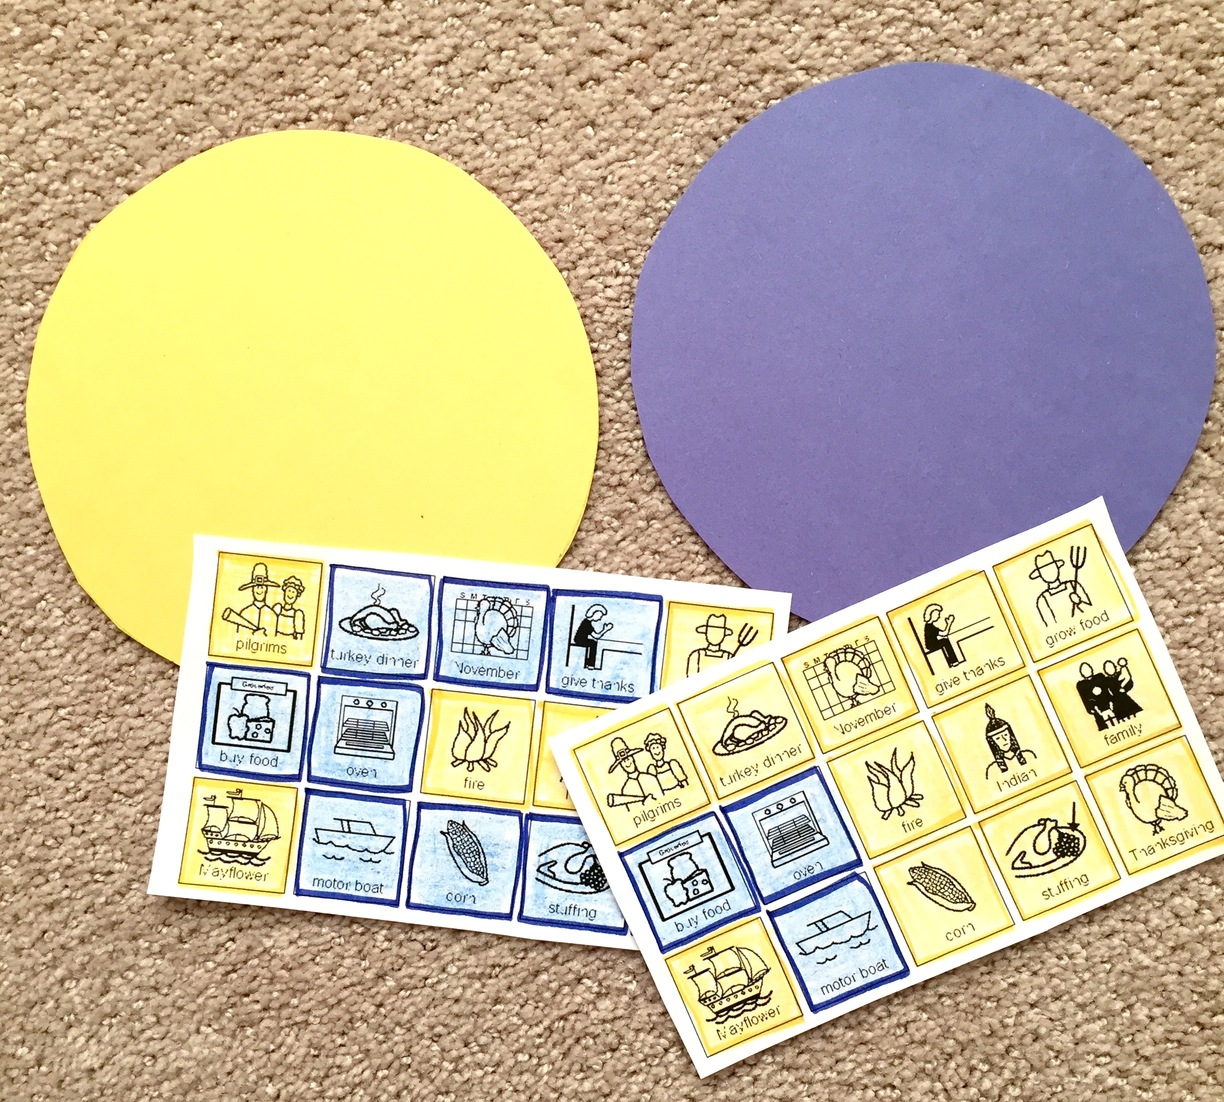
3. So some kiddos are just not ready for a Venn Diagram and what it really can tell us about how 2 things are alike and different. So, for those students, I just use 2 colored circles and print 2 sets of sorting pictures. I give them a complete set of pictures, PLUS those that would have gone in the intersection. That way, if it was a shared characteristic, they have 2 of that picture. Then add the level of color coding you think is most appropriate.
Circle Maps
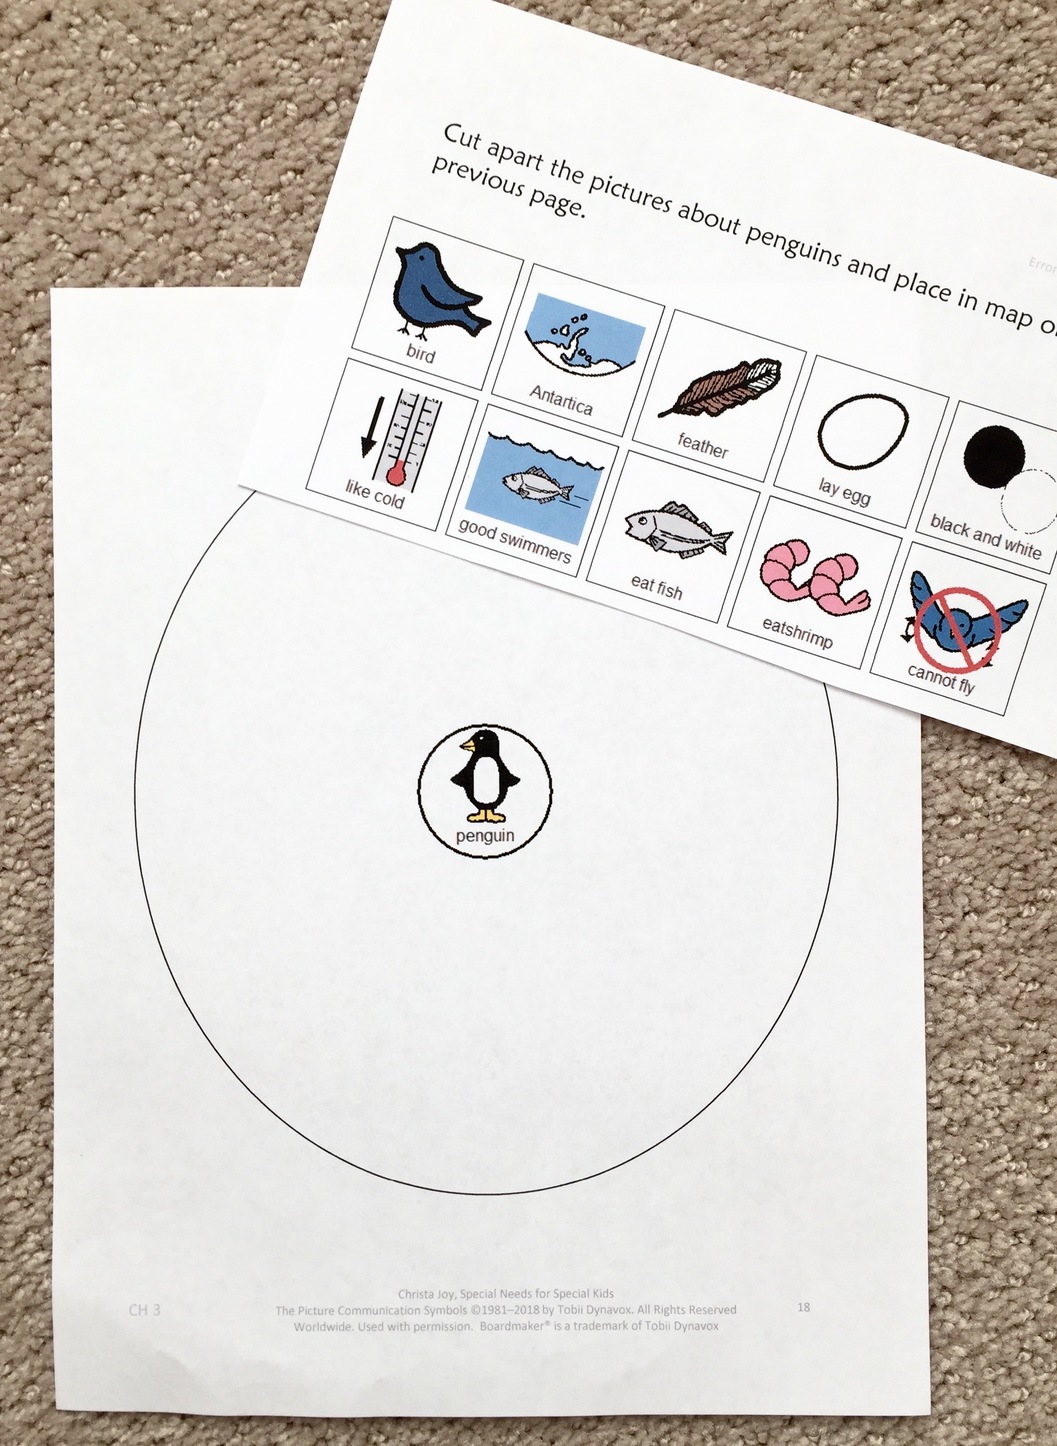
In general, graphic organizers are great for students. They are a perfect visual representation of the information we know about a topic. I’ve had some teachers tell me this is how their kiddos “take notes” while reviewing. Very age-appropriate, engaging, and effective. (The following activity is from my novel unit, Mr. Popper’s Penguins. You can check it out HERE.) Here are some ways to use the same circle map across various learning levels.
- For your lowest-level learners, I would make the activity errorless. That means, you ONLY include correct answers for them to put in the circle map.
2. If you include wrong answers mixed with the correct ones, you can outline or color in the correct ones using the same technique we used above.
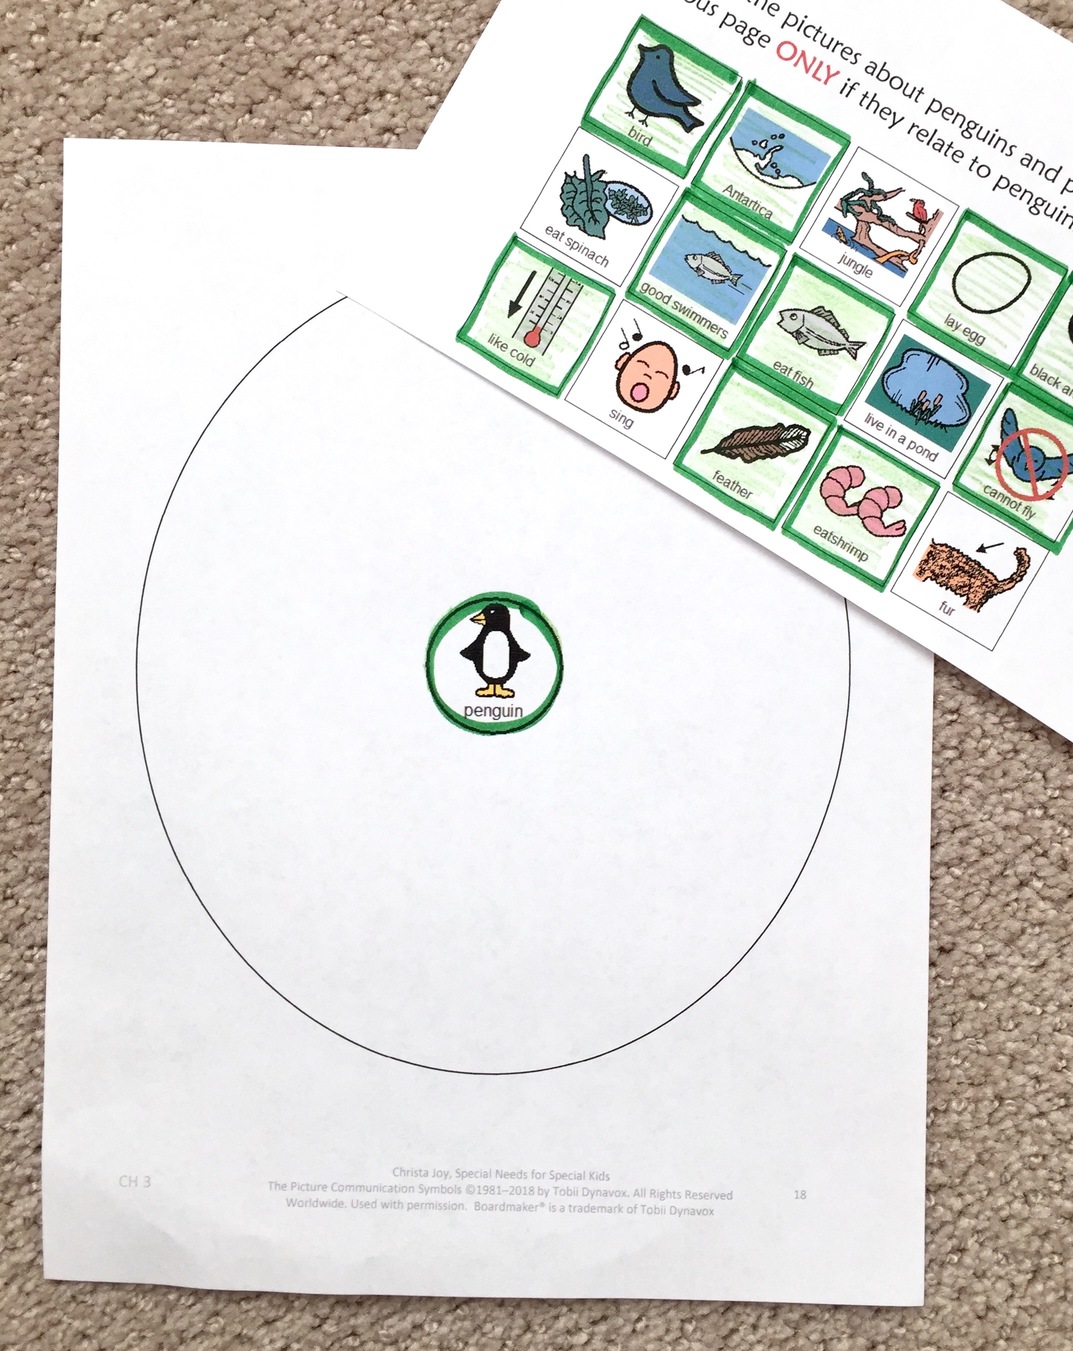
3. For even higher-level students, you can provide them with an answer key to use to check their completed circle map for accuracy.
Again, for most of the activities above, you are using the exact same materials, just modifying them slightly. And, it really does not take much time.
Here are some helpful tips I have found:
- Do NOT give your students glue sticks until they are done. That way, you can check their work, easily remove incorrect answers, and ask them to try again. Most kids love to glue, so the reward at the end is getting to glue all their answers down.
- For students with significant fine motor challenges, I pre-cut the pictures if my primary goal is to assess comprehension of the content.
- Record data on each student’s initial product. That is what you should use as your data point, even though they get a chance to make corrections.
- Use self-checking whenever possible. Give them a copy of a completed sample to check their work with.
- Send the same activity home so parents can review it and complete it at home. Always let parents know the level of differentiation you used, or add it before sending it home.
I hope there are some things in this post that will make your day just a little easier and more efficient. If you would like access to any of the activities you see above to try it out for yourself, just click the button below to get ALL 3!!
2 Comments
Comments are closed.