Many of us use a schedule to help our students navigate through the day. Schedules are so helpful in building independence and reducing problem behaviors. If students know 1) what is coming next, 2) how long it will last, and 3) what the expectations are, things tend to run much more smoothly. In addition to class schedules, I found schedules outlining how the group lesson would run incredibly helpful. Here are some tips and some free schedule cards to download that go with many of my activities.
1. Spend some time familiarizing your students with the schedule cards
Before you start using schedules for your actual lessons, make sure your students are familiar with the pictures, symbols, words, or even objects you will use to indicate which activity is about to occur. You could work these into a social story or use them as a daily review during your circle time or morning meeting. Making sure your students understand which activity goes with each schedule card is helpful before jumping in.
2. Be consistent
Since consistency and repetition are the name of the game in many of our classrooms, this is easy to establish. Many of us do the same activities in various lessons. We may read a book, complete a worksheet, or do a craft, regardless of whether we are teaching math, science, or social studies. In reality, it is often structured the same. There is just different content.
3. Decide if you want to use one schedule or individualized schedules
So this will depend upon the makeup of your students. I have done it differently over the years. Sometimes you have students at such different learning levels that they need a schedule right in front of them. Some have such challenging behaviors that having their own schedule to manipulate can give them some sense of control and lessen anxiety. Even with individual schedules in place, I still had a master schedule for the group that I could manipulate.
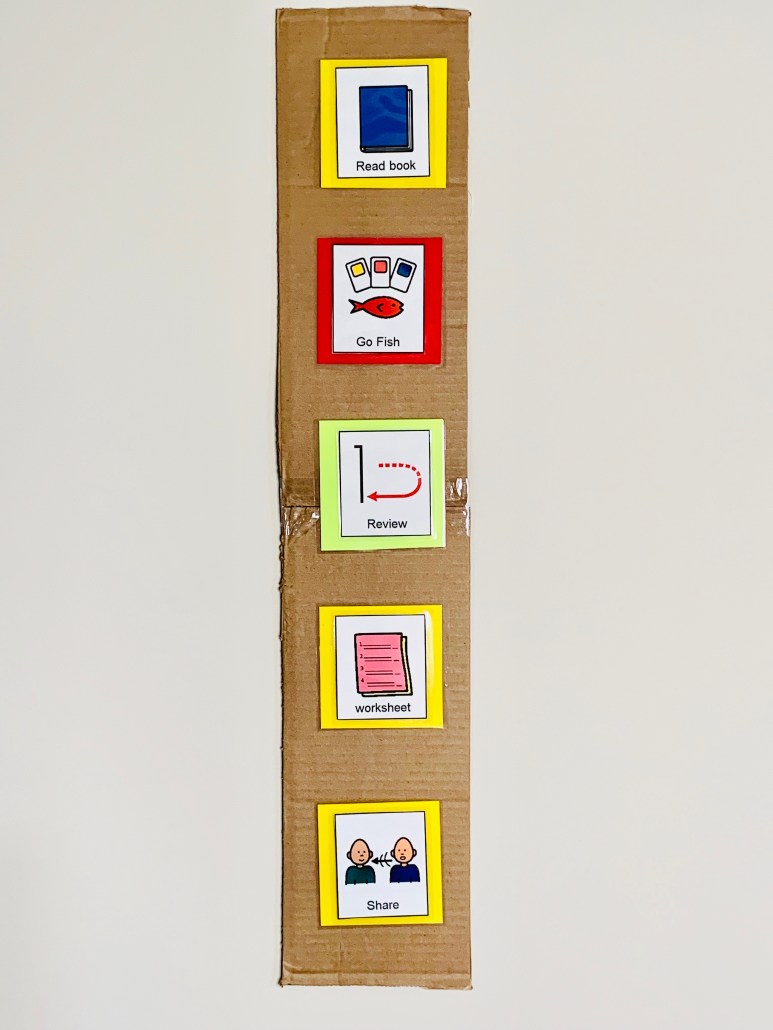
4. Display the relative time of each activity
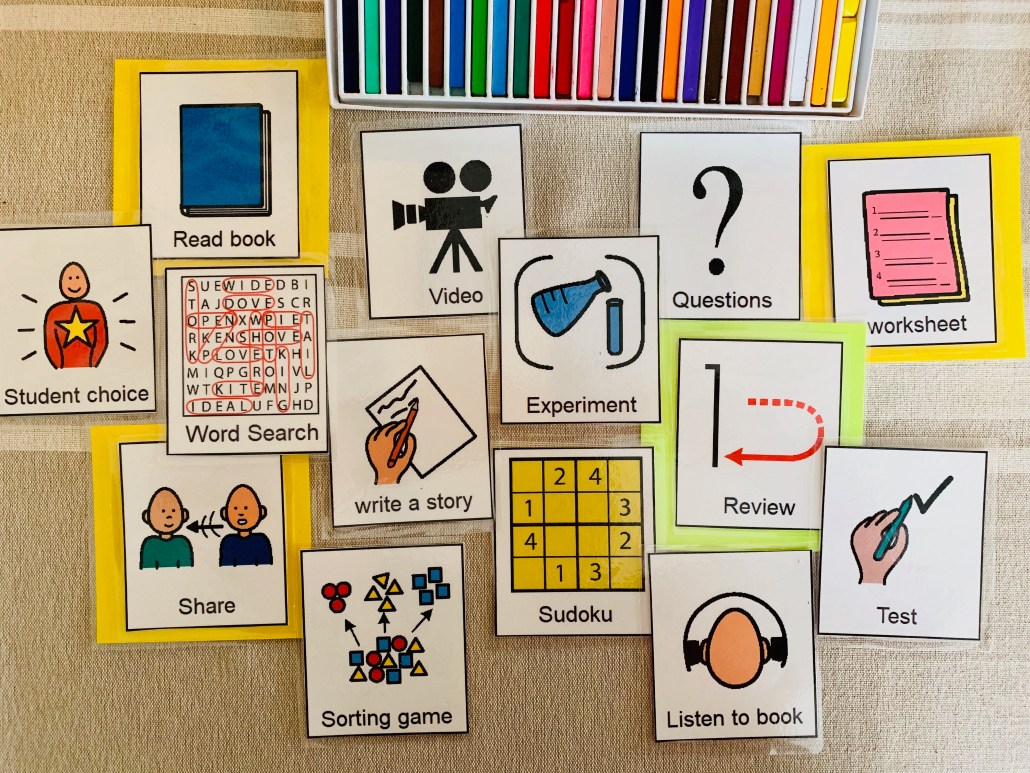
I never wanted to be held to a stopwatch while I was teaching, so I never used exact time blocks on my schedule. But, I did feel it was important and helpful for students to know if each activity would take a short, medium, or long time. In some years, I used colored backgrounds, as shown below.
- Green was a short activity
- Yellow was a medium activity
- Red was a long activity
5. Using the schedule
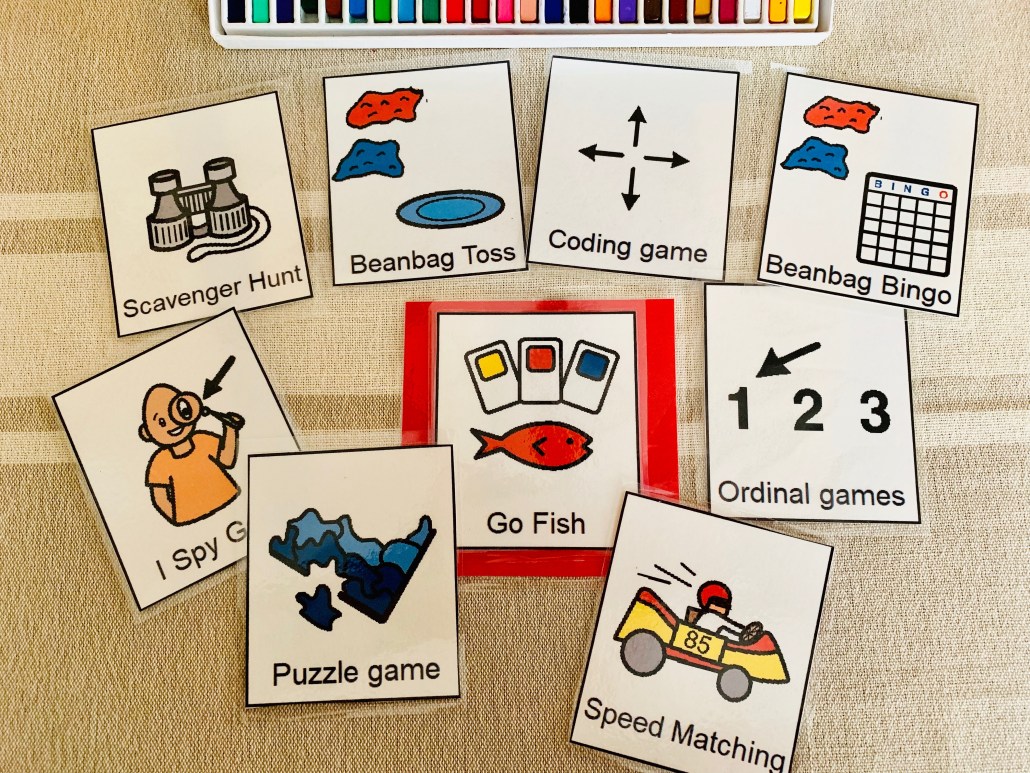
Once the schedule was set up, I would go over the activities we were going to do. As we completed each activity, a designated helper or I would remove the card. For some activities, I had several choices, and I wanted the students to decide what we would do. For example, during our vocabulary card or board review activity, there are a ton of options. Once the students were really familiar with all the different games and how to play them, I would let them choose which particular activity they wanted to add to the schedule that day. By the end of the year, I was allowing students to pretty much plan the entire flow of the lesson.
If you read my previous blog post, Awesome Activities to do with Vocabulary Boards (click HERE), I wanted to offer everyone a free download with a picture card you can use with each activity. They are available in two sizes and in color and black-and-white. You can download them by clicking the button below.
-
Large vocabulary activity cards -
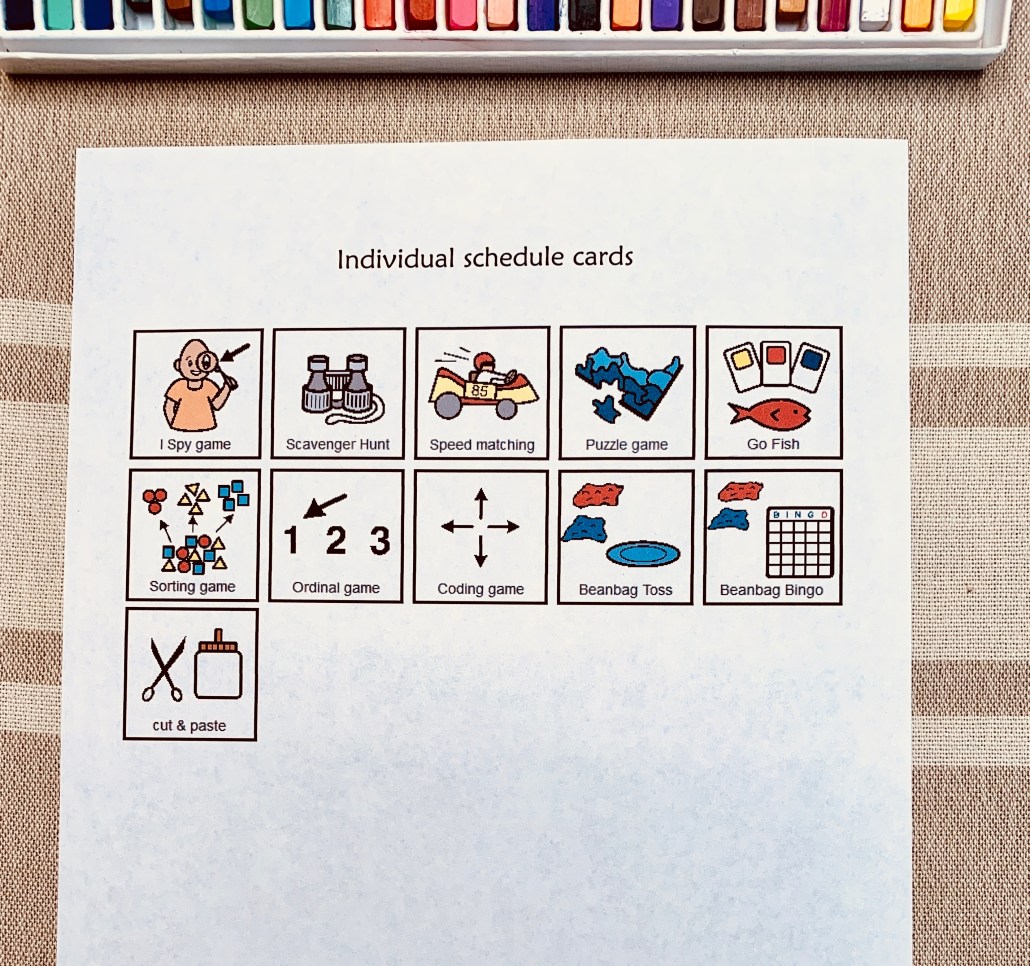
Cards for individual student schedules
I know much of this is second nature to many of you. Hopefully, there was one “aha” moment in here for you. Finally, if you need some general schedule cards to go with your lessons, then click the button below for all the other schedule cards (besides the vocabulary ones above) that I found helpful and correspond with most of the activities found in my units on TPT.
-
Large other activity cards -
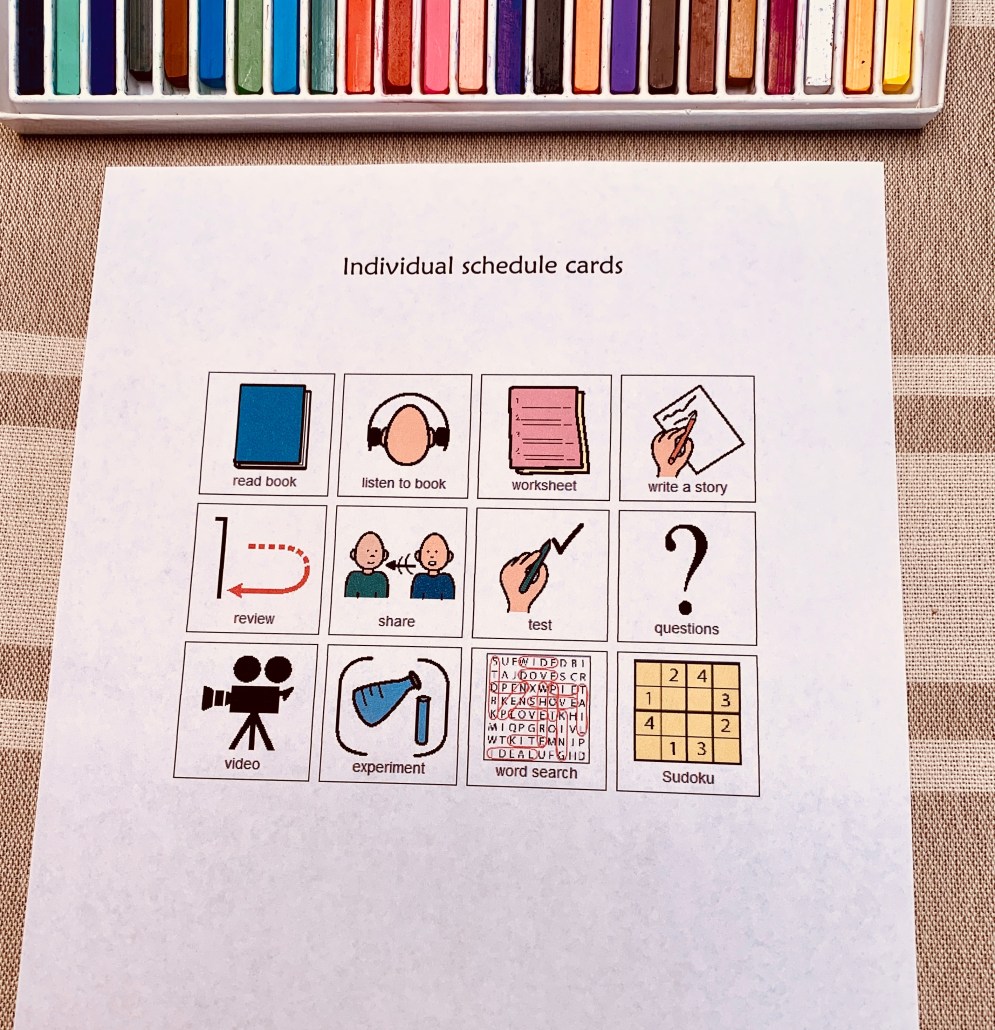
Cards for individual student schedules

2 Comments
Comments are closed.