Those fine motor skills can be really tricky to work on. Especially when you are also trying to teach content at the same time. We all know that teaching skills in the natural environment is preferred, but it sure isn’t always easy. Here are 5 simple ways to you can take ONE task that requires cutting and quickly differentiate it for all the students in your class.
1. Thicken the lines
Some students have a pretty good grasp of how to use a pair of scissors. They have the dexterity and the strength to cut a piece of paper in half. For these students, they may just need an extra visual cue as to where to cut. For these students, I take a black marker and just thicken the lines a bit. This is a great way to subtly modify the task if the student is in a general education inclusion setting. Hardly anyone will even notice.

2. Highlight the line
This is another visual cue for those students, who can cut on their own but just need more visual support. I use a colored highlighter to trace the lines I want them to cut. It is also a great idea to practice this in isolation, when you are not teaching a lesson. I always try and use the same color, so students get used to seeing that as a cue, “cut here.”
3. Add a physical barrier
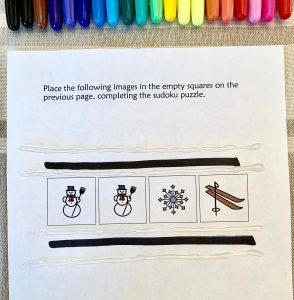
I learned this one by watching my OT. She would place Wikki Stix (thin strings covered with a sticky wax substance) on either side of the line she wanted the student to cut on. Well, I didn’t happen to have these fancy little stix in my classroom, but I did have hot glue, and lots of it. So, I just put a bead of hot glue down either side of the cutting line ahead of time. If the student started straying off the cutting line, the hot glue was really hard to cut through. It gave them some sensory feedback that they had fallen off the line.
4. Pre-cut some of the pieces
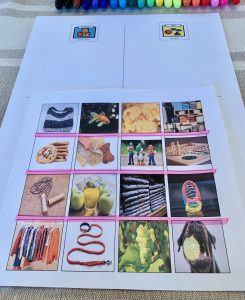
Prepping materials in a special education classroom is more than half the battle. If needed, I would ALSO sometimes do some of the cutting myself ahead of time. This way, students were not waiting for me to get things ready. Everyone was able to cut out the same activity at the same time. (Having a bin or folder for each student in the group was super helpful in keeping all of this organized.)
5. Free cutting
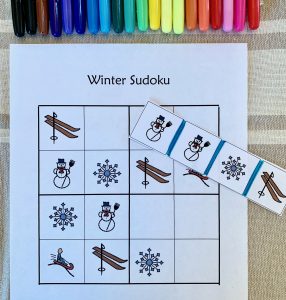
Ok there are some students who are just not going to be able to attend to the paper long enough to cut on a line. It won’t matter how much hot glue I piled on there. For these students, I often just let them cut wherever they wanted to on the paper. They still had the same activity as all of the other students. But when it came time to actually DO the activity, voila!! I would have some pre-cut pieces for them ready to go. I had prepped these ahead of time. That way, all the students felt they were involved in the same activity.

I think most special education teachers are accustomed to spending their free time prepping materials for the next day. We spend HOURS laminating, cutting things out, and adding Velcro. Taking a little time to add some visual cues to cutting activities can really pay off when it comes to whole group participation. There is nothing worse than students sitting around while the teacher or assistant cuts out the pieces for them. Using one of the above techniques, will help overall participation and increase student engagement.
If you are looking for ideas that do not involve scissors at all, then check out my blog post on No Scissors Allowed. Click HERE to read about some alternate ways to complete those cut and paste activities without ever having to cut a thing!!
One Comment
Comments are closed.