Using timelines can be a great way for students to visualize a chain of events. Making them large enough for students to manipulate can be a great way to increase engagement and get students up and moving. Here is how to make that work…
Many times, when I find myself teaching historical content, I shudder at all the dates that come up. Of course, I want my students to have some general understanding of what happens first, second, and last, but the actual dates are not that critical to me. Having said that, I don’t always know what is important to my students. Students with autism often have quirky interests and splintered skills. So, I don’t want to leave the dates out altogether. Set your expectations high, and more often than not, your kiddos will surpass them and AMAZE you!!
So, how do you make dates and events in history have meaning to ALL your students? Try making a life-sized timeline. Here is what you need:
- Identify a few major events in the subject material
- Cardstock
- Color printer (or colored pencils to color in yourself)
- laminator (for durability and repeated use)
- Make a timeline card on a piece of paper
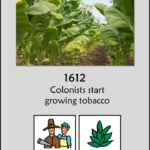
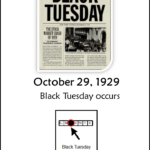

- OR, just print out the ones I have provided below FOR FREE
Once your cards are printed, pass them out to the students. Challenge them to see if they can put themselves in order. There are lots of ways you can differentiate this.
- Put single numbers (1,2,3) on the back of the card
- Put a matching picture or image (or number) on the floor so the student stands on the image they are holding
- Use fewer cards for classes that have more challenges
I would definitely recommend doing this exercise every day as part of your lesson plan. In addition, if at all possible, I like to have the kids (in the communication mode of their choice) read their card as you go through the timeline. I also liked taping the cards up at the front of the room after the exercise was complete, so the students could see the finished product from the front. One last super exciting way for the kids is to videotape them reciting the finalized timeline. It is another great review tool!
Finally, I like having students complete the same timeline in a smaller cut-and-paste format. This helps with generalization and is something they can take home to review. Of course, I have these included in all the units I have listed below (the link is in the free timeline you can download)
Ready to try it? Click below to download a life-sized timeline for FREE. I hope you find this activity as engaging and impactful as I did.
One Comment
Comments are closed.